Wednesday, December 26, 2007

WATERMARK PICTURE


Here is a picture with the watermark applied. I used Photoshop CS3 following essentially the same exact steps. The only difference is that Photoshop CS3 doesn't have an Artwork and Effects palatte. It is done by going to Filter>Stylize>Emboss. The rest of the steps are the same. As in all things Photoshop (CS3 and Elements), there are at least three different ways to accomplish anything. You could do something similar and more quickly within the photo document by adding a type layer, typing text in white, and changing the opacity of the type layer without rasterizing at all. That is the quickest way to put a "watermark" on the image, but it's not embossed. Just flatten your image when you are done and save it as a separate document so that your original photo is left untouched. It really depends on how fancy you want to be. Having a separate document is nice so you don't have to create your watermark a million times, but an even better way is to make your watermark a brush which is saved with Photoshop and does not need to be opened as a document, just apply the brush (essentially like a stamp). But that's a tutorial for another day!

Tuesday, December 25, 2007

ADDING A WATERMARK TO YOUR PICTURE

This is a lesson on how to add a custom watermark to your pictures using Adobe Photoshop Elements. We'll be creating this as a new blank file so that you can drag and drop your watermark into any image. This lesson is from Scott Kelby's "Adobe Photoshop Elements 5 for Digital Photographers" book. This is an excellent book for learning the different aspects of editing an image and using Elements. Photoshop Elements is now in version 6. A version 6 of the above book will probably be released, if it hasn't been already, but you can use exercises from the version 5 book. It just won't cover additions or changes in the newest version. Any of Scott Kelby's books on Photoshop and digital photography are excellent books, easy to read, and affordable if you purchase them at Amazon or Buy.com. Scott also publishes a newsletter for Adobe Photoshop Elements, at www.photoshopelementsuser.com. This is an excellent source for Elements users and addresses the scrapbooking aspects as well.

Step 1. To create a file, choose File>New>Blank File. Click on the Foreground color and choose a medium gray from the color picker and click OK. Then press Alt-Backspace to fill the background with grey. Then press the letter D to reset your foreground color to black.

Step 2. Press T to switch to the Horizontal Type tool. In the Options Bar, choose a font like Arial Bold from the font pop-up menus, and the click on the Center Text icon. Click the cursor on on the gray background, press-and-hold the Alt key, type "0169" using your numeric keypad (NOT the numbers at the top of your keyboard), and release the Alt key to create the Copyright symbol. (Note: On a laptop, press-and-hold the Function key to access your keypad, the numbers superimposed over the left-hand side of your keyboard). Then press Enter to move your cursor to the next line and type the name you want for they copyright photo. If needed, adjust the leading (space between lines) by selecting all your text (Control-A) and choosing a point size in the Set the Leading pop-up menu in the Options Bar (located above your document and below the menus). Creating text automatically creates a new layer in the Layers palette for the text. Now hide the Background layer by clicking on its Eye icon in the Layers palette.

Step 3. Highlight your name (but not the copyright symbol) with the Type tool and increase the size of your name by using the Set the Font Size pop-up menu in the Options Bar. When it's at the right size (your call), highlight just the copyright symbol, and resize it upward until it's quite a bit larger than your name. This is optional. Make this type whatever size suits your need.

Step 4. Go to the Artwork and Effects palette (if it's not visible, go under the Window menu and choose Artwork and Effects), and in the More fly-out menu choose Large Thumbnail View. At the top of the palette, click on the Special Effects button (the one right in the middle). In the pop-up menu in the palette's upper left-hand corner, choose Filters. In the second pop-up menu, choose Stylize. Now double-click on the Emboss effect. A warning dialog will appear letting you know that the Type layer must be simplified. Click OK.

Step 5. In the resulting Emboss dialog set the Angle to what appeals to you, I used 135 degrees, and change the height to 3 pixels and Amount to 100%. Click OK, and this will apply a beveled effect.

Step 6. Go back to the Layers palette and change the blend mode for this Type layer from Normal to Hard Light. This will make the watermark transparent. Now you can make the Background layer visible again by going to the Layers palette and clicking in the empty box where the Eye icon used to be. You can now see the Emboss effect clearly.

Step 7. Open the photo you want to contain this transparent watermark. Make sure this photo and the document with your embossed watermark are visible within Elements (if not, exit Maximize Mode by going under the Window menu, under Images, and choose Cascade).

Step 8. Press V to switch to the Move tool, then click-and-drag the watermark's Type layer from the Layers palette of the embossed watermark document (and ONLY the Type layer, not the Background layer) and drop it onto your photo (you're dragging a layer between documents). Once the watermark is in your new document, you can resize it as needed. Just press Control-T to bring up Free Transform and click-and-drag one of the corner handles. Add the Shift key to resize the type proportionally. Press Enter to complete your transformation.

Step 9. Now to to the Layers palette and lower the Opacity of your Type layer so it's clearly visible, but doesn't dominate the photo. You now have a new Layer with your watermark. Save this document in the Photoshop format (psd) so that you can edit the watermark layer later, if needed. Then Save As for a new document and save a JPEG document to use for the web or another document.

Be sure to save your Watermark document as a PSD file too, so that you can use it on other images or edit the information if needed. If you need additional help, email me at vickiconquest@fixthatpicture.com.

Thursday, August 23, 2007

SEMINARS COMING UP!

Fix That Pictures will be offering introductory seminars on Adobe Photoshop Elements 5 at the Children's Miracle Network Crop on August 25th. We will have a booth at the crop event with equipment on display and will be offering the seminar twice that day. The crop is being held at the Wesley United Methodist Church on Republic Road and runs from 9a to 7p. My first seminar is at 11a and the second one is at 4p. We'll also have some fun stuff at the booth, so we look forward to seeing you there! This is your opportunity to learn more about this fantastic program and how it can help you organize, touch up and print your pictures! You can call the Scrapbooking Momeez for more information about this crop at 417-753-3313, or surf on over to their website to learn more about this crop .

Sunday, March 18, 2007

HOW TO TAKE CLASSES

After much thinking, burning of brain cells, discussing with friends and former students, this is how I am going to go about offering training on Photoshop Elements 4 or 5.

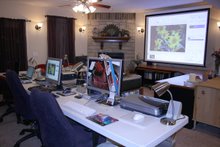
I am going to list the classes available. I'll add additional topics as requested. You can call and schedule to take any class you want at a mutually agreeable time depending on your schedule and mine. This can be during the week, day or evening, or on a Saturday. Setting up a schedule does not seem to work for everyone, so I am going to try this approach. Essentially, it can either end up being one-on-one training or I may end up with several together. When someone calls to schedule a class, I will post it to the blog and through email. If anyone else is interested, you can join in on that class. Class cost is the same whether I have one or four. This will hopefully work to everyone's advantage. At this point, I am only doing training here at the house and cannot do training off site unless it is for a group of people. I will be scheduling some seminars, which are not hands-on training, but will be in conjunction with other events in the community. All classes are 2 hours long unless otherwise specified. Some are higher because of the cost of consumables (paper, ink, CDs). Please bring your own laptop if you have one. If you specifically want a one-on-one class with no other students, the cost is $20 an hour and you will need to specify this. The only exception is the class at the bottom for former students. Here is the list of the classes:

Introduction to Photoshop Elements 4 or 5—$25
Learn all those technical terms and whether they mean anything to you or not. We'll look at Elements and it parts, discuss file formats and when and where to use them, and other issues important to digital image editing and using digital cameras, scanners, tablets, CDs/DVDs and printers.

Using the Organizer—$25
Learn how to properly import your pictures, organize and tag them, move them between folders, delete them and archive them to CD/DVD.

Resolution, Cropping and Resizing—$25
We'll be working with the concept of resolution and how it interacts with image size and file size as it relates to printing, viewing on screen or in a presentation and sending over the web. Also work on cropping images using good photographic rules of thumb.

The Editor Interface and How It Works—$25
We'll go over all the tools, their functions and options. We will look at all the menu options, how tool options affect menu options and how to show and hide docking items, images and tools and briefly use these tools.

Color Correction in the Editor Interface—$25
We'll learn how to correct low light or overly bright color images, how to fix coloration problems, and get the best contrast and tonality from the image. Nobody wants to be a lobster. You can bring your own images on a CD or Flash drive.

Selection Techniques and Using Masks/Layers—4 hours—$60
This is CORE to using this program to it's fullest, if you don't do anything else, do this! You'll learn to use a Wacom tablet to help make selections. Learning to make selections is fundamental to using Elements and layers. We will be working with Layers in this class.

Retouching Images and Removing Unwanted Objects—$25
Yes, this is the class to give Uncle Charlie a third eye. Seriously, we learn how to retouch faces, objects, and how to remove unwanted things, people, warts, zits, glare from glasses, and such. We'll whiten those teeth without the aid of Crest or Colgate. You can bring your own images on CD or Flash drive.

Scanning and Photo Restoration—4 hours—$60
You'll learn to use the Epson scanner and how to restore old images. Bring at least one or two pictures 4 x 6 or less to scan and work on.

Creating Vignettes and other Special Effects—4 hours—$60
A vignette is a picture that focuses on an object and fades out to the edge (or burns—black). We'll also look at Converting to black and white, Sepia, and colorizing and desaturization. You'll be printing your images to a wide-format printer. Bring several large images (5 x 7 or larger on CD or Flash drive).

Creating Photo Montages (Collages)—4 hours—$60
We'll create a montage of images. You'll be printing your images to a wide-format printer. Bring at least 4 images or more on CD or Flash drive.

Text Effects—$25
Adding text over pictures and placing pictures within text and other creative text effects.

Additional Special Affects, Exploring Effects Options—4 hours—$60
All those fun things we didn't get to the first time. You'll be printing your creations.

Creating Brushes and Downloading Resources—3 hours—$45
Scrapbookers beware! This will suck you in and spit you out years later. Give Rhonna Farrar a run for her money. Those Two Peas have nothing over you after this class.

Working with Your Digital Camera & RAW format—$25
If you have a camera that lets you shoot in RAW, this is for YOU! RAW is awesome and let us show you why.

Color Management—$25
On a PC, this is a critical issue. You want what you see on screen to at least somewhat look like what you print. This process is called calibration. The Mac does it a lot better, but there are options for the PC as well to get to at least pleasing color. We'll show you how.

Using Photoshop Elements 5's New Create Feature—$25
Another great scrapbooker feature as well as some great presentation features. You won't want to miss this class and this is a completely new feature set to Elements 5 catering primarily to the scrapbooking market.

I Thought I Knew, But Now I Forgot—$25 to ??
For any former student. This can be any topic you want. We can cover old stuff, new stuff, work on a specific project or whatever is on your mind. Cost will be determined by how long you need and what additional equipment we might need to use (to cover consumables cost). This class is considered a one-on-one class for any one who is NOT a former student.

Friday, February 9, 2007

WHY WE'RE THE BEST TRAINING IN TOWN!

We have the best pricing on our training than anyone else. Low overhead helps us to keep our pricing at a rate anyone can afford. Our comfortable environment is very conducive to an excellent learning experience, especially when you are being trained by an instructor with over 20 years of experience in Adobe Photoshop, from the very first version!

When you take our classes, you will have the opportunity to learn the tricks-of-the-trade, something you don't get in a college-sponsored continuing education course. We keep our class sizes small so that we can maximize your learning experience without the distraction of large class sizes. We just don't tell you to do such-and-such, we tell you WHY you do it, advantages and disadvantages, and HOW you would use that feature or effect on your pictures.

Even better, our classes go beyond the basics. We teach special effects classes, text effects classes, how to create your own brushes and stamps (for all you scrapbookers out there), and we teach scanning classes, too. We even have classes on working with digital cameras and RAW images. We are the TOTAL training source for digital imaging. We even assign homework!

If you have your own laptop, we ask that you bring it to work on. Working on your own equipment helps your learning curve tremendously and you have easy access to work on your own photos (otherwise, I have to ask you to burn your pics to a CD or copy to a flash drive so you can work on them on our systems, and it's just not the same beautiful experience). We are also occasionally known to serve chocolate.

Keep in mind, to work with Adobe Photoshop Elements 4/5, you need to be using Windows XP (Elements 4/5) or Mac OS 10.3 (Elements 4). You can download a free trial version from Adobe's web site [www.adobe.com] that will work for 30 days. Otherwise, the cost for the program is about $90, even cheaper if you are a student or faculty/staff ($69). Adobe has been doing digital color for 20 years. It is the Rolls-Royce of image editing programs. If you are using another image editing program, burn it and go buy Adobe Photoshop Elements 5. Now. Go! Run! And if you are a scrapbooker, take a plane! Adobe added features in PSE5 specifically for scrapbookers and you are going to love it. 'Nuff said.

Friday, January 19, 2007

Welcome to Fix That Picture!

Welcome to the Fix That Picture! blog. I'll be posting Photoshop Elements 4 & 5 class schedules, equipment recomendations and tips and tricks to this blog while we get our web site up and running. Stay tuned for more information!